ko-fi

Translate

Welcome To My Darkside


Sunday, September 18, 2011

Halloween How-To Potato Fingerling Creepy Critters

So ugly they're cute! That is what comes to mind when I see these silly little creatures.  Gourds and small pumpkins are a spooktacular addition to a well decorated Halloween table.I enjoy using both in my displays and at my Halloween feast. I came across these Fingerling Potatoes and couldn't help wondering how they would do as a Halloween prop. The only way I was going to find out was to get some and see what happens, so I did. I wasn't all that sure if they would dry up so that they would be useable or if they would just mold and decay. To my surprise and over time they did dry up but, before they did, they did what potatoes do when left to sit, they grew sprouts! Which turn out to be a good thing because it added to the creepiness factor. What you will need.

1) Fingerling Potatoes ( How ever many you want to make)
2) Black beans (with a white dot on them)
3) Carving tool (or small knife)
4) Something to cover your work space with. (even though there is very little mess with this project)
Step 1) Take your carving tool of choice and carve a little hole for the bean.
Step 2) Then add your bean.
Step 3) Repeat on the other side. When you have finished with your other potatoes. They should look like this. They already look creepy just the way they are. They will get even creeper after a couple of weeks and end up looking like these guys.
This one reminds me of Randell Boggs
Just a word of warning. If you do use them for decorations at your Halloween feast make sure your guest don't eat them! Enjoy!

 Thanks Chucky from Spooky Scary Art Creations  for "it's so ugly it's cute" 

Monday, September 5, 2011

Update: Evil Jester Paper Mache Project

Just started painting him. Here is what he looks like now. He still has a way to go before being finished.


Here is what he looked like before paint. Evil Jester work in progress. It is a slide show so you may have to give it a few seconds for the pictures to start changing.

Tuesday, August 23, 2011

Halloween Silhouettes

I love discovering new and fun ways people use silhouettes in their haunted displays. I have gathered a few of my favorites to share here.

There are so many amazing Silhouettes Artists out there!

My favorite animated silhouette this year is one I discovered on Love Manor Created by Soyeon Kim and Todd Hemker at Yellowshed for American Greeting.com I hope you take the time to view it. You can even send it to your favorite ghoul or Goblin if you wish to...


Here is another Silhouette artist I follow who I find very unique and creative. I love seeing what he will come up with next. John Fair Killouettes

The great thing about these is that you can purchase them and they also come on jewelry.


Next is a How-to I found on Creative Ideas For You via A Place to Bloom this is so pretty, for those who are not so much into gore, but prefer a less extreme form of Halloween decor.


Here is an inspiring way to decorate with Silhouettes. By Pink and Polka Dot


And here she has a How-to for this lovely silhouette Eat Crow


Here is another beautiful way to silhouette found on The Pink Peony of Le Jardin


She also shares her How-to and the printable silhouettes!

And here is a cute silhouette I found at the dollar store which makes a great shadow silhouette! I used it in some of my product shots.

Thursday, August 4, 2011

Evil Jester Paper Mache Pumpkin work in Progress

This is Jester, an obvious work in progress. He is one of my bigger pumpkins he measures 51" around, not including the tongue and he's 20" tall. You can view the slideshow below to see my progress. I will post updates as he progress. Not sure if I will let him keep the tongue yet.


Find more photos like this on Garage of Evil!!

Monday, July 25, 2011

DIY Halloween Candles Evil Trees

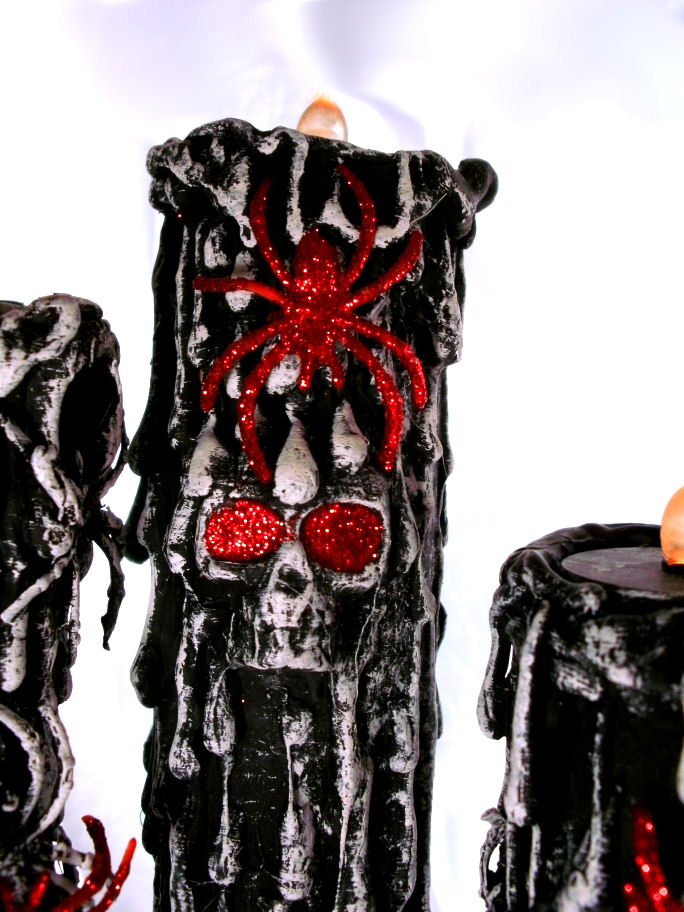
When I started making candle props out of discarded paper towel rolls I had no idea what it would turn into, or if they would even turn out. They did and to my surprise, these are not a flimsy paper craft,they are strong and durable they feel like rubber, they're flexible, so you do not have to worry about breakage and they're water resistant! I am sure if one wanted, one could add a sealant and totally water proof them. I really hadn't a clue how well a paper towel roll would work in place of the pvc pipe but I am so happy with the results. Of course after that first one came another and then another...


The very first candles I made were stand alone individual candles, that I could place alone or in groups.


Then on came the imagination along with it all sorts of different types of candles!

Skulls and glitter spider's


Tombstones and candles


Candles with faces


and now evil trees


Find more photos like this on Garage of Evil!!


My paper towel roll candle creations have become a huge part of my prop making.I hope you enjoy these as much as I do. If you would like to see my creepy candle how-to you can here HouseofDewberry creepy candle How-to

You might also be interested in seeing where my paper towel roll inspiration came from RavensHallow's How-to pvc candles.On the Garage of Evil. She has an easy to follow tutorial on pvc candles which are different from mine, but are what inspired me. I came upon her candles and love them! I thought it would be fun to create them to use in photo shoots, Halloween displays, etc. At that time I didn't have any pvc pipe handy or the particular lighting for those candles, but, what I did have was paper towel rolls and tea lights!

If you feel inspired and I hope you do; to make some of your own paper towel roll candles or pvc pipe candles I would love it if you send me a link or pictures to be featured here.
Have fun and enjoy!

Sunday, July 3, 2011

My Creepy Found Object Makeover

This lovely thing is a find my Mother showed up with one day. She found it on her many travel through miscellaneous stores and shops around town. She is a notorious contributor to my, shall we call it what it is, my deconstruct rebuild habit.

I had taken a couple of pictures of it before I started to work on it, it was a while ago that she found it, maybe a year or so. I had this thing kicking around the garage for a long time as I didn't have the time to work on it. Then one day I grabbed it and started to transform it with out thinking about taking more pics, but I though I would share it anyway.

Maybe at one point it was pretty and I wonder where it was displayed. Was it a table topper at someones wedding or special event? I guess I will never know.

The color combination I found interesting. It was yellow brown and orange and the flowers had kelly green glitter on them. The glass candle holders had an Italian green and gold lace frill around the base of them, with white lace covering the Styrofoam platform on which the candles base stood.

I took it a part and painted the candle stand black, then put it back onto the platform. Then smeared it with monster mud, the lace, flowers and all. The center of it needed something so I made a paper mache skull painted it black and dry brushed it with white. Before adding the skull I made a nest with black moss for it to lay in. I took the flowers that I had made from monster mud and outlined them with black glitter to match the candles which I made from repurposed paper towel rolls, find the how-to here and covered them with scrap paper. How to on scrap paper candles to follow shortly for those who maybe interested. I mounted the candles and made the wax drips then painted them black and added black glitter to them to match the flowers. This is what it looks like now....


It is black and white with the lights on and looks gorgeous. I am not a photographer so my pictures don't really do it justice.


You can also see it here. Follow the link.


House of Dewberry Haunted Woodland of Weir on Etsy


Here is what is looks like with some colored light effects.