This is Jester, an obvious work in progress. He is one of my bigger pumpkins he measures 51" around, not including the tongue and he's 20" tall. You can view the slideshow below to see my progress. I will post updates as he progress. Not sure if I will let him keep the tongue yet.
Find more photos like this on Garage of Evil!!
Thursday, August 4, 2011
Monday, July 25, 2011
DIY Halloween Candles Evil Trees
When I started making candle props out of discarded paper towel rolls I had no idea what it would turn into, or if they would even turn out. They did and to my surprise, these are not a flimsy paper craft,they are strong and durable they feel like rubber, they're flexible, so you do not have to worry about breakage and they're water resistant! I am sure if one wanted, one could add a sealant and totally water proof them. I really hadn't a clue how well a paper towel roll would work in place of the pvc pipe but I am so happy with the results. Of course after that first one came another and then another...
The very first candles I made were stand alone individual candles, that I could place alone or in groups.


Then on came the imagination along with it all sorts of different types of candles!

Skulls and glitter spider's


Tombstones and candles

The very first candles I made were stand alone individual candles, that I could place alone or in groups.


Then on came the imagination along with it all sorts of different types of candles!

Skulls and glitter spider's


Tombstones and candles

Candles with faces


and now evil trees

Find more photos like this on Garage of Evil!!
My paper towel roll candle creations have become a huge part of my prop making.I hope you enjoy these as much as I do. If you would like to see my creepy candle how-to you can here HouseofDewberry creepy candle How-to
You might also be interested in seeing where my paper towel roll inspiration came from RavensHallow's How-to pvc candles.On the Garage of Evil. She has an easy to follow tutorial on pvc candles which are different from mine, but are what inspired me. I came upon her candles and love them! I thought it would be fun to create them to use in photo shoots, Halloween displays, etc. At that time I didn't have any pvc pipe handy or the particular lighting for those candles, but, what I did have was paper towel rolls and tea lights!
If you feel inspired and I hope you do; to make some of your own paper towel roll candles or pvc pipe candles I would love it if you send me a link or pictures to be featured here.
Have fun and enjoy!
Saturday, July 16, 2011
Tuesday, July 5, 2011

Sunday, July 3, 2011
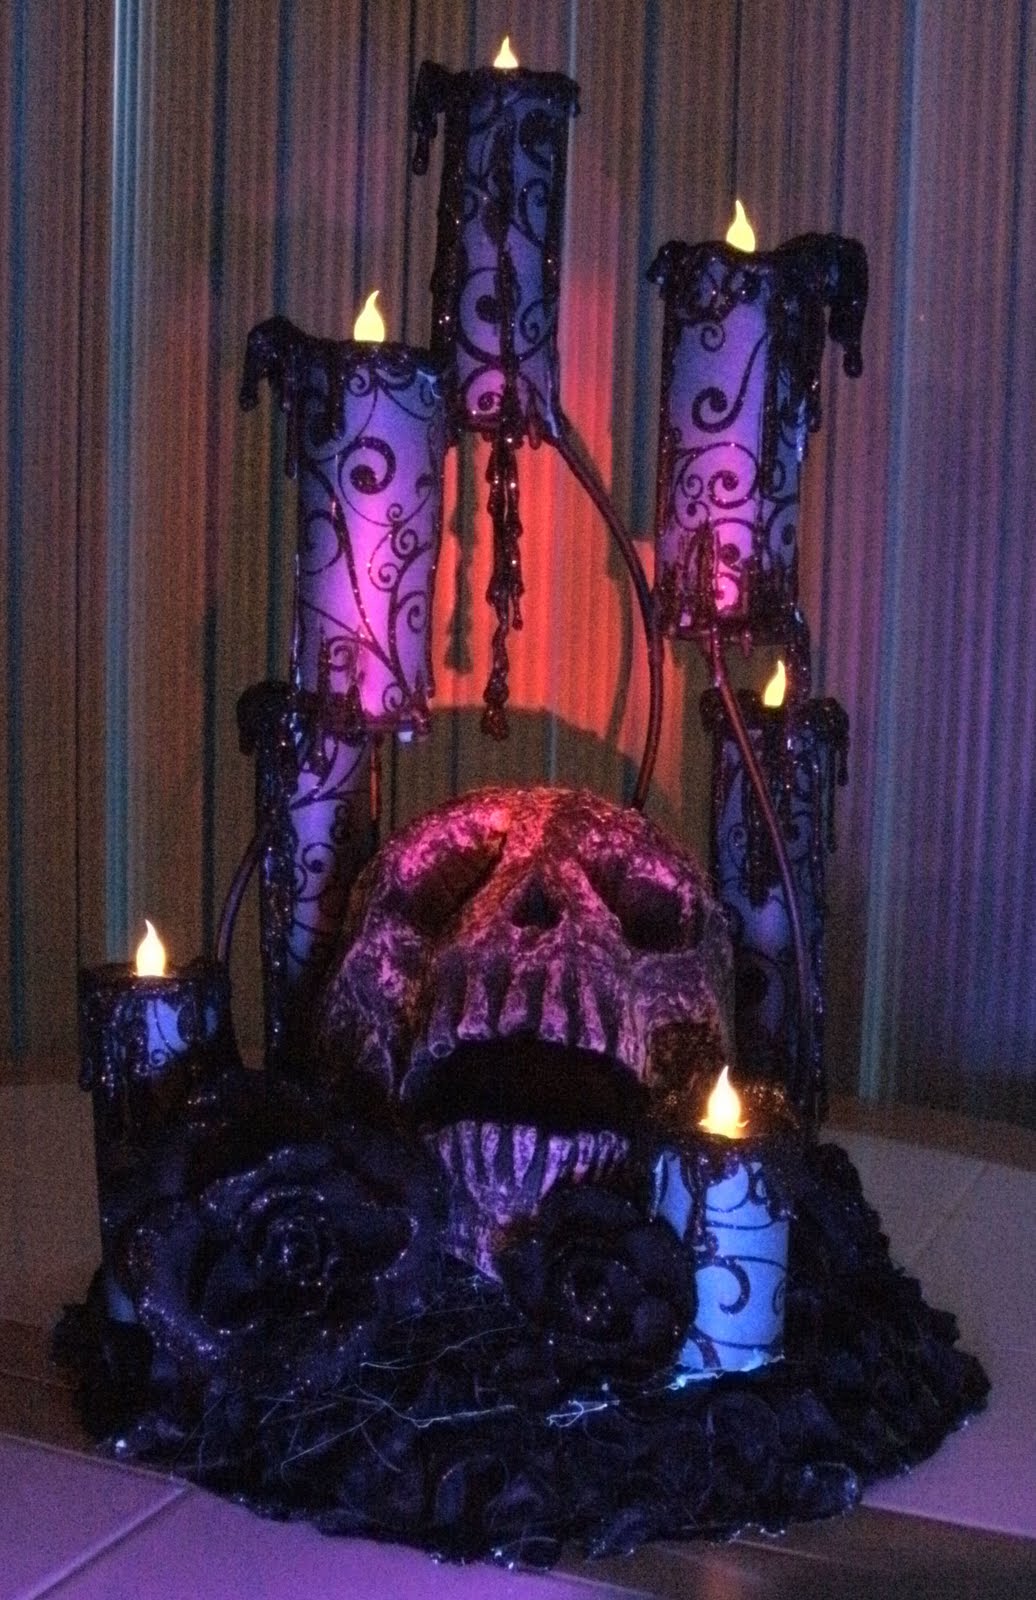
My Creepy Found Object Makeover
 This lovely thing is a find my Mother showed up with one day. She found it on her many travel through miscellaneous stores and shops around town. She is a notorious contributor to my, shall we call it what it is, my deconstruct rebuild habit.
I had taken a couple of pictures of it before I started to work on it, it was a while ago that she found it, maybe a year or so. I had this thing kicking around the garage for a long time as I didn't have the time to work on it. Then one day I grabbed it and started to transform it with out thinking about taking more pics, but I though I would share it anyway.
 Maybe at one point it was pretty and I wonder where it was displayed. Was it a table topper at someones wedding or special event? I guess I will never know.
The color combination I found interesting. It was yellow brown and orange and the flowers had kelly green glitter on them. The glass candle holders had an Italian green and gold lace frill around the base of them, with white lace covering the Styrofoam platform on which the candles base stood.
I took it a part and painted the candle stand black, then put it back onto the platform. Then smeared it with monster mud, the lace, flowers and all. The center of it needed something so I made a paper mache skull painted it black and dry brushed it with white. Before adding the skull I made a nest with black moss for it to lay in. I took the flowers that I had made from monster mud and outlined them with black glitter to match the candles which I made from repurposed paper towel rolls, find the how-to here and covered them with scrap paper. How to on scrap paper candles to follow shortly for those who maybe interested. I mounted the candles and made the wax drips then painted them black and added black glitter to them to match the flowers. This is what it looks like now....

It is black and white with the lights on and looks gorgeous. I am not a photographer so my pictures don't really do it justice.


You can also see it here. Follow the link.

House of Dewberry Haunted Woodland of Weir on Etsy
Here is what is looks like with some colored light effects.
Thursday, June 30, 2011
Edgar Allen Poe: Life and Time in the Bronx
This is amazing glimpse into the life of Edgar Allen Poe. If you are a Poe fan it is a definite watch.
Wednesday, June 29, 2011
DIY Candle Poject by Hunter
 This is Hunter! My rockin cool nephew! He had a project to do for English class. The objective was to turn trash into a viable working object. He choose to make what else? Candles Yay! Anyway, the title of his project was "One man's trash is another man's treasure!" How perfect an opportunity to use, what else, the paper towel roll that ends up in the trash. He put together a little photo shoot showing his project and had mom send it over to me to share, here it is.
A note about my Sister in law's house. She has the neighborhood house where all the kids end up after school and on the weekends. No matter when you drop by you are going to find kids running in and out. They have the fun house on the block, the one with the very large tree in the backyard, with the gigantic tree house built in it, the trampoline, tree swing, etc... inside there is the huge screen TV for video games, movies, guitar hero, etc. Oh and she always has plenty of snacks and drinks. My sister in law is huge on keeping all the kids fed and hydrated! A lot of cooking and creating goes on there, so it didn't surprise me too much when I received these pictures of Hunter's project, I love it. Thanks Jodi and Hunter!
Here are the pictures, I hope they serve to motivate and show you how easy and fun it is to make these candle so you can have fun too!

Here he is showing the glass pebble that he use to weigh the candle down. How cute!

His candles are ready for glue drips!


Here he's applying the hot glue to make the candle drips.
Hard at work!

All painted!

Finish!
Working candles from throw away trash! Great job Hunter! Hope you got a A on this project!
If anyone else ventures into making these paper towel roll and hot glue candles please leave a link in the comments box. I would love to share them here on the House of Dewberry. Have fun! Here is the link to the Candle How-to
Saturday, June 25, 2011
DIY Halloween Creepy Candles

For first time readers here is the link to my how-to on making decorative spooky Halloween candle props. From beginner to more advanced these are perfect to add to your Halloween display and easy enough for the whole family to make. Made from a simple paper towel roll, hot glue and paint. Glitter, paint, or decorative paper the possibilities are endless it just takes a little imagination.


Stand alone or applied to something to make a creepy display.
 Just have fun!
Here is a link to my more advanced candles Killer Candles!
Wednesday, June 15, 2011
Killer Candles
In my last post I shared with you one of my Candle Pumpkins so this time I am sharing some of my stand alone Candles.
Both pumpkins and candles are made from the same process, paper mache, paper clay and re-purposed paper towel rolls and anything else I desire to use. If you would like to see more on how I create the candles you can read my DIY Candle How To here. Unfortunately the internet is not equipped with a feature that allows one to handle them because these candle are truly amazing, after seeing them and touching it one would definitely find it hard to imagine that they are made from a simple cardboard paper towel roll.
This is the top of the candle it holds a battery operated tea light so there isn't much concern that it can catch fire. Although if you do not have that concern the tea light is removable and will fit a wax tea light. Not that I am suggesting it, this is just for info purposes only. I personally feel better not having to worry about someone knocking one over while I am not watching.
 The face features a cut out just like on a traditional Jack o lantern.

This is the bottom where the light box is attached which not only lights up the inside of the candle but it makes a great stand for the candle.

The light box changes color making for a spectacular light display the inside of the candle I make white which reflects the color better.
 In this picture I bounced light off of it from an outside source. There are so many ways to display these, they are just as creepy with the lights on as in the dark.


 If you have any questions I love to share so feel free to ask.
Enjoy!
Madame Dewberry
Both pumpkins and candles are made from the same process, paper mache, paper clay and re-purposed paper towel rolls and anything else I desire to use. If you would like to see more on how I create the candles you can read my DIY Candle How To here. Unfortunately the internet is not equipped with a feature that allows one to handle them because these candle are truly amazing, after seeing them and touching it one would definitely find it hard to imagine that they are made from a simple cardboard paper towel roll.
This is the top of the candle it holds a battery operated tea light so there isn't much concern that it can catch fire. Although if you do not have that concern the tea light is removable and will fit a wax tea light. Not that I am suggesting it, this is just for info purposes only. I personally feel better not having to worry about someone knocking one over while I am not watching.
 The face features a cut out just like on a traditional Jack o lantern.
This is the bottom where the light box is attached which not only lights up the inside of the candle but it makes a great stand for the candle.

The light box changes color making for a spectacular light display the inside of the candle I make white which reflects the color better.
 In this picture I bounced light off of it from an outside source. There are so many ways to display these, they are just as creepy with the lights on as in the dark.

 If you have any questions I love to share so feel free to ask.
Enjoy!
Madame Dewberry
Thursday, June 9, 2011

Wednesday, June 8, 2011
Coming Soon
Here is a sneak peek at some of the items, handmade props, home and haunt decor that will be available in my new store Haunted Woodland Of Weir On Etsy when it opens this month.
This is one of my pumpkin sculptures. One picture shows how it looks in the light and the other in the dark with color lights projecting on it. I have had a lot of request for these and I am happy to finally be able to make them available to those who want them.


The next two pictures are of a table topper which I have made from re-purposed items. I will be sharing more on my creative process later for those who are interested. The table topper features a skull in which I sculpted. It also has several black roses that I made from monster mud and black glitter. The candles are made from paper rolls and have plastic tea lights instead of real wax candles so one does not need to worry about the fire risks. The tea lights are removable and replaceable.


I am very excited about and looking forward to getting Haunted Woodland of Weir up and running. I hope you will stop by for a visit.
Sunday, February 6, 2011
The Poe House and Museum Needs Your Help

For the love of all things Poe, Please help by signing this petition to save the Poe House and Museum!
Information and Petition here
Friday, February 4, 2011
Poe's Signature Sign

Can be found on the gate outside the Poe Cottage at Fordham. I love the little squirrel captured in the photo just below the sign either playing or foraging in the snow.

Vintage picture of Edgar Allan Poe's final home. Poe lived here from 1846 to 1849

Vintage Cottage Picture Source
Fordham Signature Sign From the album:
Poe's New York by The Macabre Edgar Allan Poe
Poe's Signature
Sunday, January 30, 2011
Saturday, November 13, 2010
These pictures were taken at a vendor event I was recently invited to partake in. Both the House of Dewberry creations as well as my Raven Jewelry were on display. Thanks goes out to Jodi for putting it all together and for being such an amazing host. I have to say all had fun I can't wait to do it again. Thanks to Jodi and Kelly from Merry Popits! everyone is now parading around town with Jewelry on their feet!


Subscribe to:
Posts (Atom)

